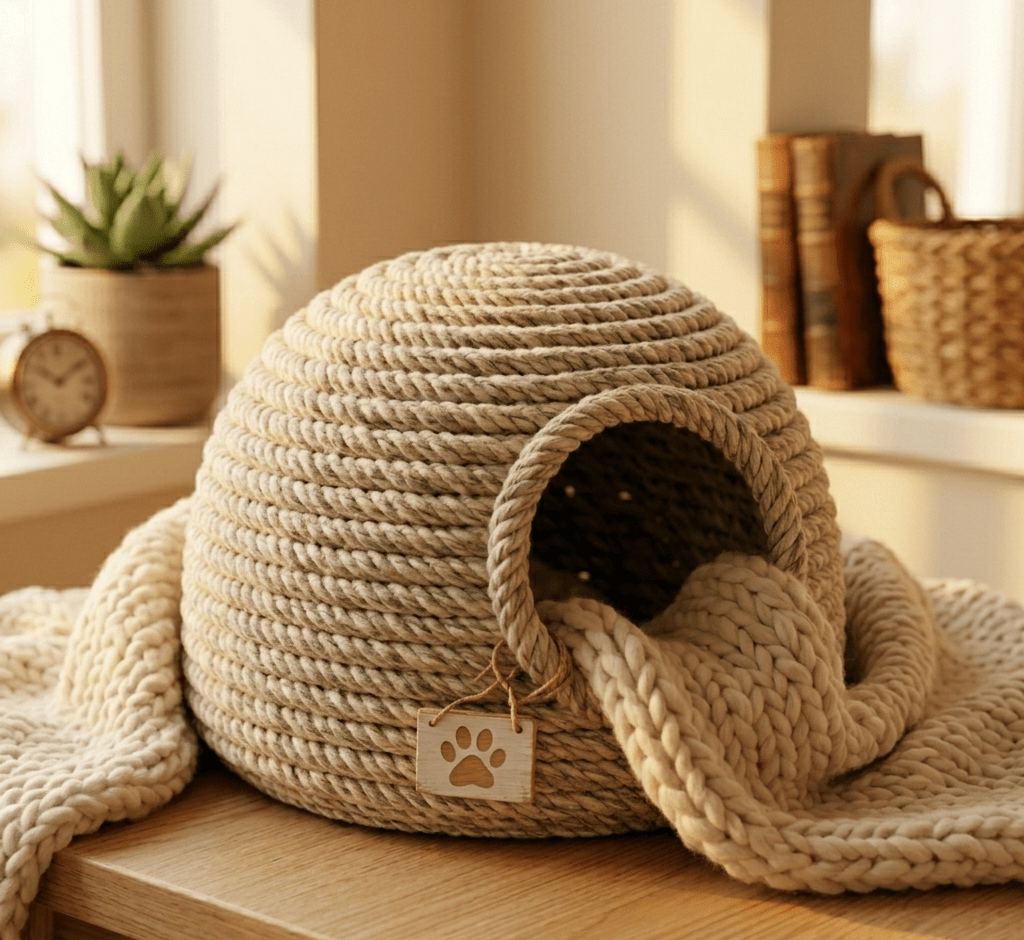
The Quilly-Cabin: A Temperature-Controlled Sanctuary
The Goal: Providing a dark, steady, and snag-free retreat that mimics a natural burrow.
The Team: Handcrafted by Mojo Projects.
The Design: A self-supporting, non-collapsible coiled sanctuary with a high-tensile cotton core.
The Quilly-Cabin is a high-stewardship habitat asset engineered for the advanced residential nesting protocols of the Biological Engine. Moving away from synthetic frameworks, this design integrates a high-tensile cotton cord core with a precision-wrapped textile binding to create a prestigious, professional-grade sanctuary. It is built to facilitate psychological security and environmental stability, providing a rugged “garage” that maintains its structural logic without the use of plastic or glue.
What Makes a Cabin?
| The Part | What it’s Called | What it Does |
| Cotton Clothesline | The Structural Rebar | A continuous internal core providing primary vertical rigidity and hoop strength. |
| Heavy-Gauge Yarn | The Binding Interface | High-tension wrap material that fuses the coils together into a monolithic wall. |
| Reinforced Base Spiral | The Foundation Ballast | A high-density, flat-coiled floor engineered to prevent tipping during entry. |
| Integrated Arch Lintel | The Portal Support | A reinforced entryway segment that maintains the dome’s weight-bearing capacity. |
How to Build a Cabin (Mojo Projects Instructions)
- Establishing the FoundationThe Mojo Projects team starts by initiating a tight spiral using the cotton clothesline. Each rotation is fused to the previous coil using a high-tension binding stitch, ensuring the base reaches a calibrated diameter of 8 to 10 inches to provide a stable footprint that won’t slide across the floor.
- Engineering the Vertical AscentTo transition from the base to the walls, stack the cotton cord directly atop the outermost foundation coil. Maintain high tension on the binding yarn to create a compressed seam, allowing the cabin to rise vertically. The incline is checked every three rotations to ensure the walls stay upright and open for the resident.
- Architecting the Entry PortalAt the 4-inch height mark, the team creates a “Floating Lintel” by wrapping a segment of the cord in isolation before re-fusing it to the row below. This creates a structural arch that mimics a natural burrow entrance, providing a clear transit corridor while maintaining the dome’s integrity.
- Vaulting the Celestial DomeThe final stage requires a radial decrease, gradually pulling the cotton cord toward the center to close the roof. This creates a dark, cozy, and steady environment. The terminal end is back-stitched into the interior wall to prevent any unraveling during high-intensity nesting.
- The Snuggle TestApply pressure to the finished dome to ensure the coiled “rebar” maintains its shape. Run a hand along the interior to verify the specialized “quill-safe” texture is smooth and snag-free. If it is dark, insulated, and structurally sound, it is ready for a quiet getaway.
A Friendly Reminder: Please keep an eye on your pets while they play or rest. No sanctuary lasts forever! Check the interior regularly for any wear to ensure the mission remains a safe haven.
